While exploring one of the detox programs, I came across "goat yogurt" as a main dessert. I've already written many times about why goat milk is better than cow's milk, and this way of framing the dessert question left no doubts for me — it's tasty, healthy, homemade, and contains nothing but milk and bacteria. Perfect.
But there’s a small “but”:
- I wanted to save space in the kitchen, so I don’t own a yogurt maker — it’s quite bulky;
- I also didn’t have a thermos (I recently threw away both of mine and haven’t had time to replace them).
I scoured the internet and found several methods for making yogurt at home without the aforementioned equipment. I chose the one I liked the most (wrapping a hot pot in three warm sweaters was not the winner) and gave it a try. And it worked! Now I feel the need to share this with you :)
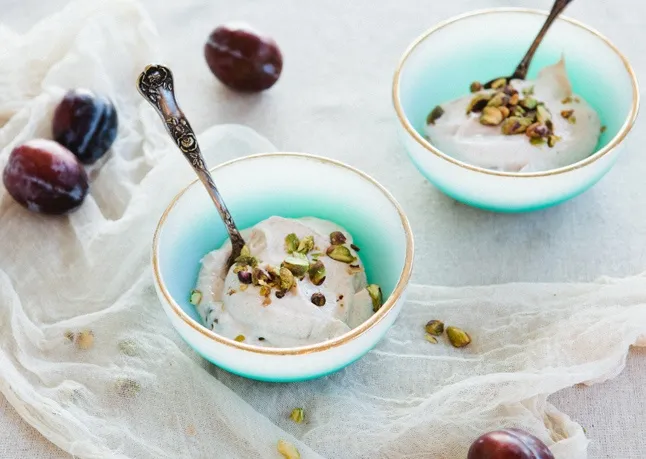
For 1 liter of goat milk yogurt:
- 1 liter of goat's milk
- 1 ampoule of bacteria (starter culture)
Preparation
If you’re using raw milk but aren’t sure of its quality, bring it to a boil (around 90°C). This is the point when steam appears, and the bubbles around the edges of the pot grow and start to move vigorously. Let it cool and then follow the recipe. Since goat milk contains almost no casein — a complex protein that acts as a "glue" and complicates digestion — it doesn’t need to be boiled. Boiling it won’t provide any extra benefits; on the contrary, it can destroy beneficial enzymes. However, many people prefer not to drink raw milk. In that case, boiling becomes necessary. For pasteurized and ultra-pasteurized milk, this step is unnecessary. Personally, I drink raw milk and use it to make yogurt.
Process
Scald the pot and spoon you’ll be using with boiling water. Heat the milk to 37–43°C. It’s helpful if you have a kitchen thermometer. If not, this temperature is slightly warmer than body temperature — drops of milk on your wrist should feel warm but not hot (I deliberately tested without a thermometer to confirm this). Be careful not to heat it above 50°C, as that will kill the bacteria instantly.
Dissolve the dry starter culture in the milk. Pour the mixture into containers that have also been scalded with boiling water. You can use glass jars with tight lids (like those used for hot jam) or clay pots (very rustic and charming). Don’t worry — nothing will crack, as we won’t be using high temperatures.
Preheat the oven to 45°C (typically, the first mark on oven dials is 50°C, so set it slightly lower). Place the jars of milk on a baking tray, put them in the oven, and… forget about the yogurt for 6–7 hours, or overnight. Store the finished yogurt in the refrigerator.
Eat yogurt for breakfast. Enjoy it plain, with honey or syrups, serve it with pancakes, use it to dress leafy salads, or mix it with fiber for extra health benefits.

Photo: bonappetit.com
Preparation
If you’re using raw milk but aren’t sure of its quality, bring it to a boil (around 90°C). This is the point when steam appears, and the bubbles around the edges of the pot grow and start to move vigorously. Let it cool and then follow the recipe. Since goat milk contains almost no casein — a complex protein that acts as a "glue" and complicates digestion — it doesn’t need to be boiled. Boiling it won’t provide any extra benefits; on the contrary, it can destroy beneficial enzymes. However, many people prefer not to drink raw milk. In that case, boiling becomes necessary. For pasteurized and ultra-pasteurized milk, this step is unnecessary. Personally, I drink raw milk and use it to make yogurt.
Process
Scald the pot and spoon you’ll be using with boiling water. Heat the milk to 37–43°C. It’s helpful if you have a kitchen thermometer. If not, this temperature is slightly warmer than body temperature — drops of milk on your wrist should feel warm but not hot (I deliberately tested without a thermometer to confirm this). Be careful not to heat it above 50°C, as that will kill the bacteria instantly.
Dissolve the dry starter culture in the milk. Pour the mixture into containers that have also been scalded with boiling water. You can use glass jars with tight lids (like those used for hot jam) or clay pots (very rustic and charming). Don’t worry — nothing will crack, as we won’t be using high temperatures.
Preheat the oven to 45°C (typically, the first mark on oven dials is 50°C, so set it slightly lower). Place the jars of milk on a baking tray, put them in the oven, and… forget about the yogurt for 6–7 hours, or overnight. Store the finished yogurt in the refrigerator.
Eat yogurt for breakfast. Enjoy it plain, with honey or syrups, serve it with pancakes, use it to dress leafy salads, or mix it with fiber for extra health benefits.

Photo: bonappetit.com

